Finding Balance & A Family Recipe

Chicken Mornay_Foodie for TwoBalance.  As you may have noticed, few words have filled these pages over the last several months.  Balance.  It’s something that hasn’t been in my life of late.  Sadly, take-out food has been the norm for quick nourishment.  I haven’t had the pleasure of tinkering about in my kitchen, making creations that warm my soul and make me sigh with happiness. Balance. You see, a few months ago I took a new path – more like returned to a well-worn path – and started a new job back in the home building industry.  Before I started my new job, this meal was our Sunday dinner.  Life has changed, all for the better, and I must find a new balance on this path.  It will happen and food is usually what anchors me in a busy and fulfilling work life.  Balance.  This family recipe is a start.

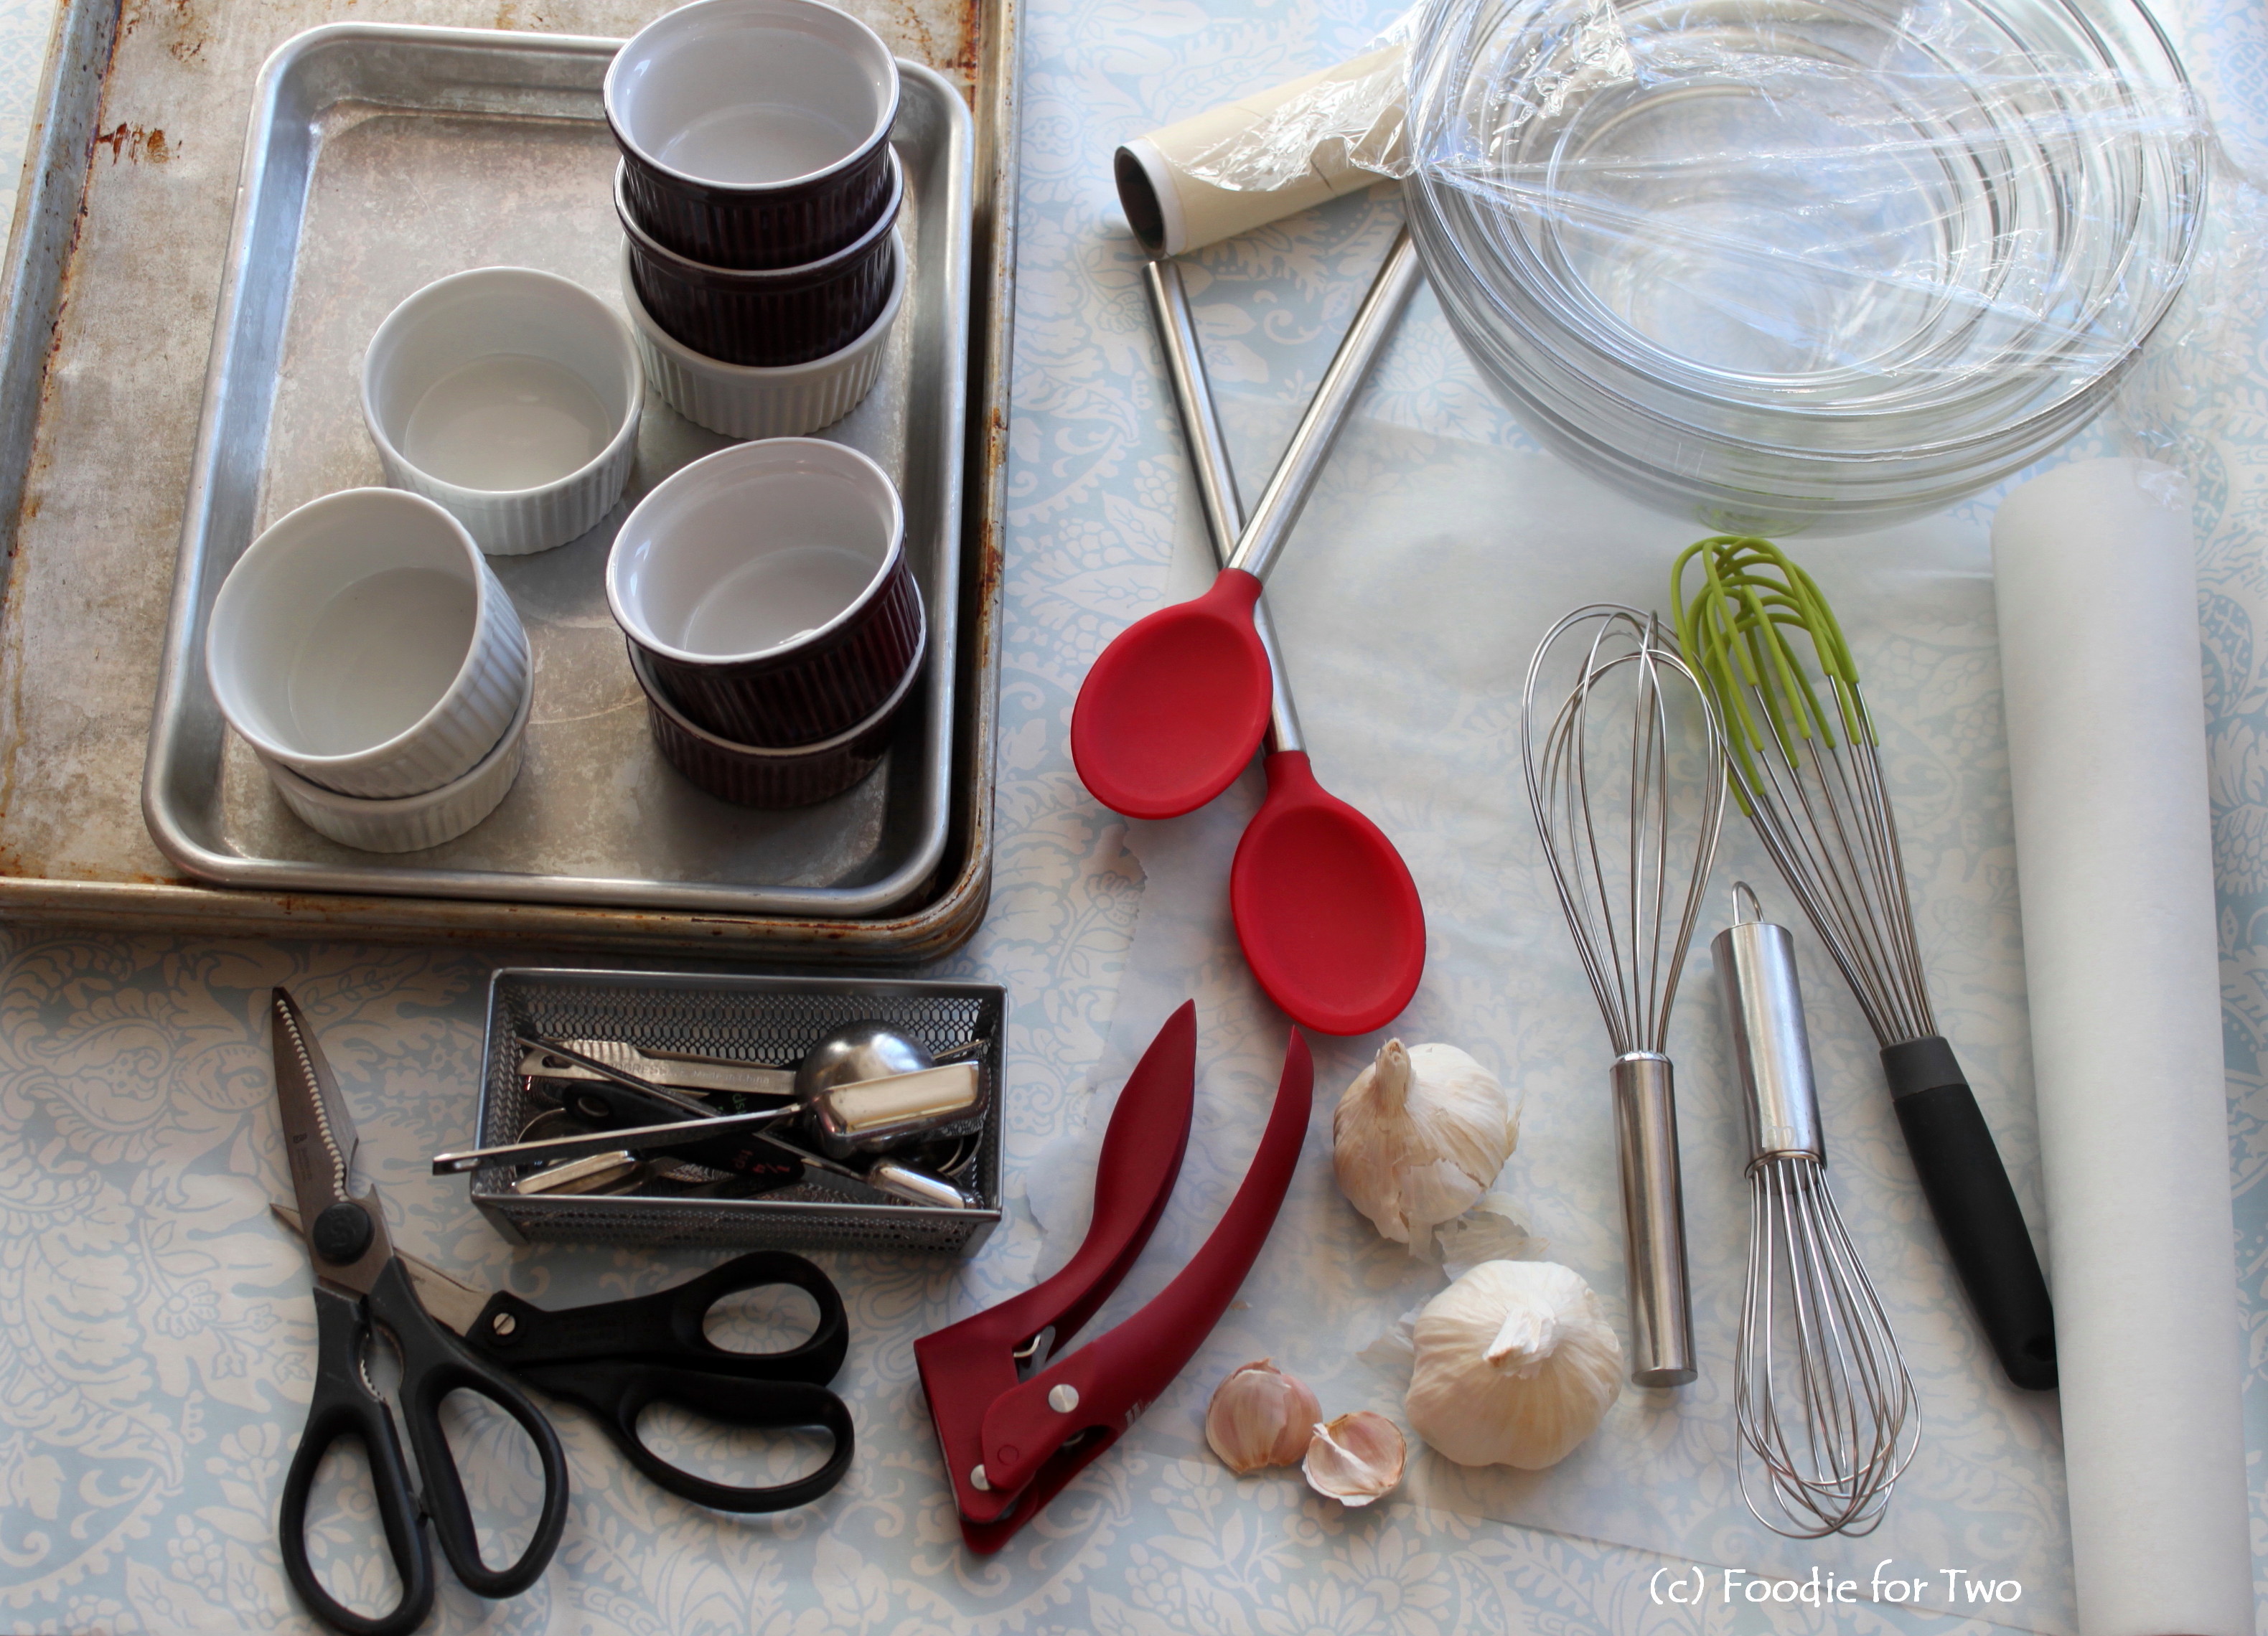
Along with creating soulful food in my kitchen, family recipes offer me a great level of comfort and satisfaction, and they help me foster the continuation of a legacy, a connection through food.  This one is a childhood favorite and has celebrated many occasions.  I am not sure where it came from but what’s important to me is that it’s from our family and my life.  Chicken Mornay is made from tender chicken breasts that are browned and then oven cooked with broccoli, mushrooms and a creamy, cheesy sherry sauce that becomes a thick gravy that begs to be scooped up with every bite.  It’s a classy dish that is easy to prepare and make.  First, I gather all the ingredients, get everything prepped and start with the broccoli.

Par Boiled Broccoli Spears_Foodie for TwoThe broccoli florets are par boiled to speed up the cooking time.  A spider, typically used for fried foods, is a helpful tool to remove the broccoli when done.  Transfer the florets to an ice bath (fill a large bowl with water and a good layer of ice cubes – the cold water stops the cooking process for the broccoli and will help retain the color) and let sit for 2 minutes, remove and drain and transfer to a cooking dish.

Broccoli spears in pan_Foodie for TwoAfter transferring the par-boiled florets to the cooking dish, toss with some olive oil, salt and pepper and arrange the florets around the perimeter of the dish.

Dredging_Flour in Paper Bag_Foodie for TwoThe next step is to brown the chicken.  The chicken cutlets need to be dredged in flour and I find the easiest way to do this is to use a sandwich paper bag (available at your local grocery story or Costco). Add the flour and spices to a bag and gently shake to stir, add one cutlet at a time, shake well to coat, remove with tongs and transfer to a plate.  Repeat with remaining pieces and toss/recycle the bag when you are done.  It makes clean up super simple.

Browned Chicken_Foodie for TwoAfter the chicken is browned, add to the middle of the cooking dish.  Now it’s time to make the star of the recipe, the sauce! 

See all those crunchy bits on the bottom of the pan?  That is pure flavor, so don’t wipe it out. Crunchy Pan Bits_Foodie for Two

The sherry and water are added to the hot pan and brought to a boil, while scraping the bottom of the pan to remove the bits, also called deglazing. 
Flavor note: The original recipe calls for American cheese and I made a substitution with a good quality white American from Boarshead.  It makes a notable flavor difference.

Leftover Mushrooms in Paper Bag_Foodie for TwoHave leftover mushrooms? Here’s a clever idea for storing them:   

Keep them in a small paper sandwich bag and store them in the vegetable bin of your refrigerator.  They will keep for about a week.  For easy identification, I like to handwrite the mushroom type and date on the outside of the bag. 

Another component of the sauce is a roux, which is a great thickening agent to keep for sauces, gravies and soups.  For me, it’s the best, surefire tool (and lump-free method) that makes me look like a pro.  Here is a trick from the culinary world using just two ingredients, butter and flour: 

Roux_Progression_Foodie for Two

When the sauce is finished, it is poured over top of the chicken and broccoli and it all cooks for 20 minutes.  Serve bubbling hot and savor the flavors!

Plated Chicken Mornay1_Foodie for TwoBalance.  It’s always a moving target but at least I know with homemade food I can satisfy and nourish my soul.  As I settle into my new groove, I look forward to sharing my stories more often and reconnecting with food – and you – again.

Eat well and share the love!Logo in Word

Chicken Mornay (print recipe)
Recipe: Melissa Schenker/Foodie for Two
Makes 2 servings
Oven: 375º | Prep Time: 20 minutes  |  Cook Time: 20 minutes

Ingredients:
2 cups broccoli florets
Chicken:
1 large chicken breast, cut in thirds lengthwise
Dredging:
½ cup flour
½ teaspoon salt
1/8 teaspoon ginger
¼ teaspoon onion powder
1/8 teaspoon fresh ground pepper
2 to 3 tablespoons olive oil
Sauce:
Roux: 3 tablespoons butter and 3 tablespoons flour
½ cup cream sherry
¼ cup water
1 ¾ cup milk (used 1%) – warm for 2 minutes in microwave on full power
6 slices American cheese (used Boarshead brand), plus for topping
8 button mushrooms, thinly sliced
Pinch of fresh nutmeg
1 teaspoon salt
1/8 teaspoon fresh ground pepper

Directions:
Heat oven to 375º

Broccoli: In a medium soup pot, fill ¾ full with water and bring to a boil.  After water has come to a boil, add a pinch of salt and the broccoli florets; par-boil for 4 minutes.  Transfer to an ice bath (large bowl filled with water and a good layer of ice cubes) and let sit for 2 minutes.  Drain, transfer to an 8” x 8” cooking dish and toss with a small amount of olive oil and some salt and pepper to taste.  Arrange around the perimeter of the cooking dish.

Chicken: Heat a medium skillet to medium-high and add the oil.  While the pan is heating, add the flour and spices to a small paper bag and dredge each piece of chicken, dusting off any excess flour.  Transfer to a plate and continue with the remaining chicken pieces.  When the oil is hot, add the chicken and cook for 3 minutes until golden brown, turn over (add a bit more oil if needed) and cook for another 3 to 4 minutes.  Transfer chicken pieces to the middle of the cooking dish.

Sauce:  For the roux, add the butter to a ramekin or small glass bowl.  Microwave on 10 second increments until the butter is melted.  Add the flour and stir well, set aside.

Using the same skillet that the chicken was cooked in, turn the heat to medium and add the sherry and water to de-glaze the pan.  Cook for 5 minutes to reduce.  Add the roux and stir well until it is completed incorporated into the liquid.  Add the milk and whisk together; bring to a boil to thicken, about 5 minutes, stirring often.  Add the cheese, mushrooms and spices, and stir well to melt the cheese.

Pour sauce over the chicken and broccoli in the cooking dish and bake uncovered for 20 minutes.  Serve hot.

************************************************************************
In April I couldn’t resist capturing this playful shot of Murphy after he buried his face in the snow.  Thankfully the ground is now covered with green grass and the tree leaves are almost fully grown.Murphy in April 2013_Foodie for Two

Eating Well and Sharing the Love with Mom

Gougeres_Foodie for TwoI bet you wonder what I have been up to, huh?  Well, in January I visited Phoenix and spent Super Bowl Sunday with Mom.  After spending a few days with my sister, it was Mom’s turn.  When we all arrived, we were greeted with mouth-watering smells drifting out from the kitchen.  Mom had made some Gougeres (small, delicate cheese puffs – recipe below) that were flavored with smoked Gruyere and rosemary and still hot from the oven!  We opened a bottle of Prosecco, toasted each other and sipped while we savored every bite of the gougeres.  Mom and I had already decided our menu before I came out and it wasn’t the traditional Super Bowl fare.  Instead, we planned out a fun menu with a gourmet flair:

Gougeres with Smoked Gruyere & Rosemary – Ponte Prosecco

Castelvetrano Olives

Baby Greens with Warm Brie & Apples and Toasted Bread

Grilled Chicken & Vegetable Skewers

Boston Cream Pie

The fun didn’t end there – the next evening we attended a glass making class at Circle 6 where we made heart shaped paperweights.  It was fun and scary at the same time because I was working with red-hot material (always under the protective guidance of the experts).

Circle 6_Foodie for TwoAfter collecting some molten glass on the end of an iron rod, it is moved over to the always-fired-up furnace (protective eyewear required) and continuously rolled, the rod is removed and the glob is rolled in color chips, and it is heated again.  Then you move to a seat so you can knead the glass a few times with large tweezers to mix the colors.  The glass glob is transferred to a mold, pressed down, released and transferred to a kiln to fire.  It was a blast.  Mom and I actually swapped paperweights because I liked how her colors came out better than mine.  It’s now on my desk at work as a reminder of my visit.

Now, back to our Sunday Super Bowl menu ……….

Brie, Honey & Pistachios_Foodie for TwoOur first course was an incredible salad of Baby Greens with Warm Brie & Apples (adapted from Barefoot Contessa recipe).  It’s easy to put together with brie wedges that are drizzled with honey and chopped pistachios, then heated in the oven until soft and almost oozing.  The baby greens are simply dressed with olive oil, balsamic vinegar, sea salt and pepper, and the warm cheese tops the salad.  Toasted French bread slices make for the perfect scoops and add just the right crunch.

Warm Brie Salad_Foodie for Two

Dinner was simple with chicken and vegetable (yellow bell pepper, red onion and cherub cherry tomatoes) skewers.  We marinated the chicken in a mixture of olive oil, white wine, honey, garlic, salt and pepper.  After we were done assembling the skewers, the sauce was drizzled over for extra flavor while cooking.

Chicken & Veggie Skewers_Foodie for Two

It was delicious and the perfect light finish to the meal.

Dinner_Chicken Skewers_Foodie for Two

My childhood favorite dessert is Boston Cream Pie and Mom makes the best!  In fact, it was usually my birthday cake when I was a kid.  Straight from the Betty Crocker cookbook, it is a white cake filled with homemade vanilla pudding and topped with a thick chocolate icing.  It is a treat for me because I can’t seem to make the cake at this altitude, so it’s not often that I get to enjoy it.  I wish I could dig into a piece right now!

Boston Cream Pie_Filling_Foodie for TwoHere are some action shots of Mom adding the homemade pudding to the cake (above), and covering it with chocolate goodness (below).

Boston Cream Pie_Top & Icing_Foodie for Two

Boston Cream Pie_Icing_Foodie for Two

Logo Foodie for TwoEat well and share the love!

Gougeres with Smoked Gruyere & Rosemary (print)
Adapted by Mom from About.com/Rebecca Franklin
Prep Time: 10 minutes / Cook Time: 30 minutes / Total Time: 40 minutes

Ingredients:
1 cup water
8 tablespoons butter, cut into ½-inch pieces
½ teaspoon salt
1 cup all-purpose flour
4 large eggs
1 ½ cups Smoked Gruyere cheese, grated
3 tablespoons Parmesan cheese, grated
1/8 teaspoon freshly grated nutmeg
¼ teaspoon black pepper
2 teaspoons freshly chopped rosemary leaves, plus 2 teaspoons for garnish

Directions:
Preheat oven to 375 degrees and line 2 baking sheets with parchment paper.

In a large saucepan, bring water, butter, and salt to a rapid, rolling boil. Make sure all the butter is melted, and then add flour. Stir the mixture for 20-30 seconds, until a sticky dough ball forms and begins pulling away from the sides of the pan. Reduce heat to low-medium heat and cook, stirring, for 90 seconds. Remove from heat and set aside for 5 minutes.

Beat in eggs, one at a time, along with cheeses, seasonings and rosemary. Place heaping teaspoonfuls onto prepared baking sheets, 1 inch apart. Bake for 25-30 minutes, rotating sheets halfway through. The gougeres are done when they are a deep golden brown and puffed.

Sprinkle with chopped rosemary and serve immediately.

Olive Jar & Olive Spoon_Foodie for TwoA surprise gift from Mom – a beautiful jar filled with Castelvetrano olives and an olive spoon attached!

A Simple Rocket Salad

Simple Rocket SaladIn my early days of being a bright-eyed foodie (yes, I still am), we went to Rose Pistola restaurant in San Francisco.  It was a fantastic meal with the perfect ambiance, attentive service and quality food.  It’s funny though – I can’t remember what I ordered for dinner because the salad struck a chord with me with its simple yet intriguing flavors.  Made with rocket (also known as arugula), persimmons and toasted hazelnuts, the salad is dressed with just hazelnut oil and salt and pepper (hazelnut oil is light yet has a heady, rich nutty aroma).  Until recently, I would only make the salad when persimmons were in season – a few short weeks here – and sometimes the season would come and go with me lamenting that “I missed the Rose Pistola salad again this year!”  While persimmons are a sweet and unique fruit to use, I started using mangoes so we could enjoy this salad almost any time of the year.  They are a dandy substitute; the sweet fruit plays beautifully against the spicy arugula leaves and the nutty flavors from the hazelnuts and oil add another dimension of flavor.  In this rocket salad, the simplicity of the flavors shines through – another wonderful food memory re-created at home.Empty Salad Bowl

Eat well and share the love!Logo Foodie for Two

Rocket Salad with Mangoes & Hazelnuts
Recipe adapted from Rose Pistola/San Francisco
Melissa Schenker/Foodie for Two
Serves two foodies for a side salad

Ingredients:
3 to 4 handfuls of rocket or baby arugula
Hazelnut oil
Sea salt (or kosher salt)
Fresh cracked pepper
½ mango, peeled, cored and sliced into strips
3 to 4 tablespoons chopped, toasted hazelnuts

Directions:
Add the rocket/arugula  leaves to a large bowl and drizzle lightly with hazelnut oil (about 2 or 3 teaspoons), along with a scant 1/8 teaspoon salt and a good pinch of pepper.  Gently toss to evenly coat the leaves; you want just enough oil so the leaves glisten.

Add the mango slices and chopped hazelnuts and toss together.  If needed, add more hazelnut oil to taste.

Mound the salad on two plates, add a pinch of sea salt on top and serve immediately.

How to cut a mango

10 Essential Kitchen Tools

10 Essential Kitchen Tools_Foodie for TwoAside from having loved ones join you, or sipping a glass of wine, there are two things that can make time spent in the kitchen more enjoyable: the right tools available and mise en place (everything in place) – or the prep work already done.  Instead of food today, I have a peek into my kitchen with some favorite tools that help make cooking a little easier.  There are a lot more than 10 tools in my arsenal but these are at the top of my list.  First, having at least one good quality sharp kitchen knife goes without saying and will always be my #1 essential kitchen tool.  Here are a few of my essentials:

Garlic PressGarlic Press
Garlic presses have gotten a bad rap over the years.  I bought into the hype that a chef’s knife was the only way to chop (or mince or mash) garlic cloves at home and have officially bucked the trend by going old school.  One of my favorite new tools from 2012 was a Kuhn-Rikon garlic press.  It’s Swiss-made and a design marvel; ergonomically easy to squeeze, the compartment swings open completely allowing for simple clean-up.

Set of Mixing Bowls
I love my glass nesting mixing bowls because they are all in one place, have various sizes and convenient to use.  If I had the room, I would add a set of stainless steel bowls.

Wire WhisksWire Whisks
Never underestimate the value of a good whisk.  Look for well-balanced, strong handles, firm whisks and a good overall weight.  Plastic covered whisks help protect the pan surface and won’t scratch.

Parchment Paper (Costco)
Oh, what would I do without my parchment paper!  I was first introduced to it in the culinary world and have been smitten ever since.  It is the perfect liner for sheet pans to roast vegetables or bake cookies, and the best way to cook bacon without the mess or splatter.

Here’s how I cook bacon in the oven: Heat oven to 375º and line a sheet pan with parchment paper, allowing the paper to overlap the edges (helps keep the grease contained).  Separate the bacon slices and place on the sheet pan in a single layer.  Cook the bacon for 20 to 25 minutes until golden and crispy, turning slices over once during baking.  For easy clean-up, let the pan cool, gather up the paper and toss.

Sheet Pans
I prefer the heavy duty pans (12” x1 7”) that don’t warp in the oven heat, and adore my quarter sheet (9” x 12”) pan for cooking smaller items.

Kitchen ShearsKitchen Shears
I like the versatility of kitchen shears because they make the task of quick cutting a breeze.  They’re great for snipping chives, scallions and herbs, or cutting bacon lardons or chicken strips.

RamekinsRamekins
Whether it’s for cooking crème brulee, individual macaroni and cheese or French onion soup, ramekins are just the right size, cook food evenly and clean up easily.  They also come in handy for mise en place by keeping your ingredients organized.

Measuring SpoonsSilicone Spoons
Sauteéing and stirring is made easier with these heavy-duty, well-balanced spoons from Tovolo.  They are stain resistant and dishwasher safe.  Plus they come in all kinds of fun colors!

Durable Measuring Spoons with 1/8 teaspoon measurement
I prefer stainless steel measuring spoons over plastic because they last longer and have a solid feel to them.  My favorite set has a 1/8 teaspoon for precision measuring.  I have several sets of measuring spoons and keep them in small container in a drawer; when baking, I pull out the container rather than going back and forth to the drawer for each ingredient measure.

Good Plastic Wrap with a built-in slide cutter (Costco)
Have you ever heard of the catering death wrap?  When transporting food, it needs to arrive neatly, fresh and intact so copious amounts of plastic wrap are often used to achieve this.  I brought this trick home, although in a more restrained fashion.  When I buy meat, I portion it out for two servings and wrap it up for freezing.  It’s also great for preserving small bread loaves in the freezer, placing between chicken filets when pounding out for paillards, and of course for extra wrapping when taking food to parties.

Now that you have seen my list, what are your favorite kitchen tools?  Are there any that you just can’t live without?  I would love to hear about it.

Eat well and share the love!Logo Foodie for Two

Chatfield Holiday Lights 1A little leftover Holiday Cheer from our stroll through the Denver Botanic Gardens Trail of Lights at Chatfield – this is my favorite tree to view each year!  I am not sure how tall it is, but you can see the scale from the people standing in the bottom left foreground.

La Bête Noire: An Elegant, Decadent & Unforgettable Chocolate Dessert

La Bête NoireJust one bite of this amazingly fudgy, impossibly creamy, positively addicting cake is proof positive of the healing power of chocolate.” 
Bon Appetit magazine, September 2006

On this Christmas Eve, I have a quick post for you that is all chocolate.  My bookshelf holds a well-used issue of a Bon Appetit magazine; the cover shot features a piece of the most decadent, rich and fudgy flourless chocolate cake that is aptly named La Bête Noire, which translates to “The Black Beast”.  I have served it many times for special occasions and it never disappoints.  This year it was the perfect finale for a Christmas dinner feast with friends.  The bottom layer of the cake consists of a flourless chocolate cake and to make it even more luxurious, a layer of ganache (cream and chocolate) is spread over the top. Whether it’s for Christmas, New Year’s Eve, a Birthday or Dinner party, La Bête Noire is one of my favorite elegant desserts.  Someday when I find a 5” springform pan I may reduce the recipe by half, but for now I always make the full recipe of 16 slices of chocolate heaven.

The recipe may seem daunting, but it’s fairly simple to make as you can see below.  It’s not included in this post but you can easily view and print the recipe here. To get started, you’ll need to prepare the springform pan for a bain marie, or water bath.  Three pieces of foil are wrapped around the sides, which help protect the batter from the water and provide insulation during cooking.Foil-wrap the springform pan_Text

For the batter, I melt the butter first and then stir in the chocolate for easier melting.  I used 12 ounces (about 2 cups) of 60% cacao chocolate chips and 6 ounces (about 1 cup) of semi-sweet chips.Cake Batter_ Melted Butter & Chocolate

Simple syrup is whisked in and then some eggs – the batter is done and ready to be poured into the pan.Finished Batter

A classic cooking method, the recipe uses a bain marie, or water bath, to cook the delicate cake.  Now you can see why so much foil is needed around the springform pan.
Place the springform pan in the bottom of a large roasting pan, pour the batter into the springform pan and then pour hot water into the roasting pan, enough so it reaches halfway up the side of the cake pan.  Bake for 50 minutes.Cake Batter in Bain Marie

After cooking, the foil is removed from the sides and the cake cools completely.Bottom Layer_Cooling

The decadent finish: a layer of Ganache is spread over the top.  Cover with plastic wrap and refrigerate for about 2 hours or overnight.

Pour Ganache over Cake

Serve with fresh whipped cream (if you have on hand, use a fresh vanilla bean for more flavor!) and savor every bite.

Merry Christmas and Happy Holidays!  I hope your celebrations are filled with chocolate, love, peace, joy and happy times.

Eat well and share the love!Logo Foodie for Two

Snow in DecemberWe’re excited that snow is in the forecast this Christmas Eve, plus we’re expecting a White Christmas tomorrow!  And thankfully, after being without heat for the last five days, our heater is being replaced this afternoon – sweet.